Crocheted Autumn Decorations : A Pumpkin and a Small Doily
Hello! Here are a couple of small crocheted pieces I made this week, inspired by the season – A Pumpkin and a Small Doily.
I displayed them a side-cabinet in our living room, among my collection of Majolica-Like Pottery pieces. Nick started this collection actually, after he brought home the big pineapple. He bought it at a garage sale held by our sweet elderly neighbour, who was moving. I actually thought it was fugly at the time and didn’t know where to put it, but it grew on me. Then when I found the other pieces on ebay and thrifting (see this post) I decided to embrace the big pineapple!
Also included in the display are some vintage books, my favourite of which is a 1946 copy of Gertrude Stein’s ‘Picasso’, complete with colour plates.
The plants are the little African violet you’ve seen before, and the Gazania I brought in from outside. It is all all done flowering and most people would be tossing this annual into the compost pile at this point but I like its spikiness and thought I’d bring it in to see if it will survive.
The apple jam-jar is a vintage piece I got from ebay, especially for a visit from Nick’s parents shortly after we were first married. He and I are not jam eaters but they are so we ‘needed’ it. Now, every time I take it out it gives me fond memories of his lovely parents, who live too far away.
The vintage chalk-ware fruit wall decorations are also something I found on ebay a while back.
About the pumpkin – I can’t take credit for the technique used in making the pumpkin, by starting with a stuffed crocheted ball and then using a length of yarn sewn end-to-end through the middle, to give it that characteristic pumpkin shape, but I am having a challenge figuring out who first thought of doing this, because there are quite a few patterns on-line which use it. (If you see this and can tell me where credit is due, please let me know and I’ll update this post.)
I am no pro pattern writer but I thought I’d give it a go for any fellow crocheters reading. These are the first patterns I’ve ever written out so I hope they make sense.
How to Crochet a Pumpkin :
Here is a quickie pattern for how I made mine (Sorry, I’m not an experienced pattern writer so this might be geared more towards experienced crocheters who will more easily understand what I’m trying to say) –
In a nutshell, to crochet a ball, you start by making a flat circle. Then you do a few rows with no increases (which will make it curve up like a bowl). Then repeat how you made the flat circle but doing the opposite, with decrease stitches instead of increases. To make my pumpkin I used a 3.5 mm hook and a light worsted yarn :
(1st row) Chain 3 and, into the first chain (it acts as the middle ring), make 7 hdcs into the ring. Slip stitch to close.
(2) Chain 2 and make 1 hdc at the base of chain. Then make 2 hdcs into each stitch in previous row (15 stitches plus beginning “chain 2” = 16). Slip stitch to close (do the slip stitch to close each row).
(3) Chain 2 and hdc into base. Then alternate 1 hdc in next stitch and 2 hdc in the one after, all the way around.
(4) Same except alternate 1 hdc in next two stitches and 2 hdcs in third stitch, and so on all the way around.
(5) Same except alternate 1 hdc in next 3 stitches and 2hdcs in next stitch, all the way around.
(6) Are you starting to see the pattern? You got it, for this row, it’s 1 hdc x 4 stitches and then 2 hdcs in the next.
(7 and 8) You can continue making a larger circle, and therefore a bigger pumpkin, but I stopped after ‘1 hdc x 6 stitches and 2 hdcs in the next’. By now you should have 70 stitches around but it really doesn’t matter if you’re off one or two in either direction.
From here you no longer have to begin every new row with “2ch” and end it by slip stitching. Instead, insert a stitch marker and use that to indicate when you’re at the beginning of a new row. Now you just go around and around.
(9-13, for 5 rows, but you can do more if you want a taller pumpkin) 1 hdc into every stitch. Notice how your piece has become bowl-shaped?
(14th row) Now you’re doing to begin closing your ball by doing a decrease stitch where previously you did an increase, so for this row it’s ‘1 hdc x 6 stitches and 1 decrease stitch, pulling the next two into one’ (therefore decreasing … if you’re not sure how to do this, there is a quick Youtube here. It demonstrates decreasing while single crocheting but it’s the same for hdc except you yarn over before inserting the hook.)
(15th row) ‘1 hdc x 5 stitches and 1 decrease stitch, pulling the next two into one’ (16th) ‘1 hdc x 4 stitches and 1 decrease stitch, pulling the next two into one’. And do on until you’re left with a small opening. Fill your ball with stuffing and close up the hole by continuing the sequence.
To shape and make the groves in the pumpkin, take a length of about 60 inches of yarn and thread it onto a tapestry needle. From the bottom to the top, sew through the middle of the ball (leaving a 4 inch tail that you’ll hide at the end). Come out the top and go around to the bottom again, and right through the ball again. Tighten it a bit to make a grove. Go all the way round for a total of 6 times (making 6 ‘sections’ in the pumpkin. Go around one more time and then play with it until you’re happy with the shape. Then remove the needle and tie the end of the yarn to the tail so the knot is as close to the pumpkin as possible. Thread both ends onto the needle and pass it into the pumpkin to hide them inside.
To make the stem : With green or brown yarn, make a magic circle. Make 10 hdcs into the ring. Then just hdc into every stitch, around and around, creating a tube. Make it as long as you’d like and finish with a row of 2 hdcs in every stitch (to make it flare out a bit). Stitch the stem onto the pumpkin. Gently toss the finished pumpkin at your husband’s head … kidding … just seeing if you’re still with me.
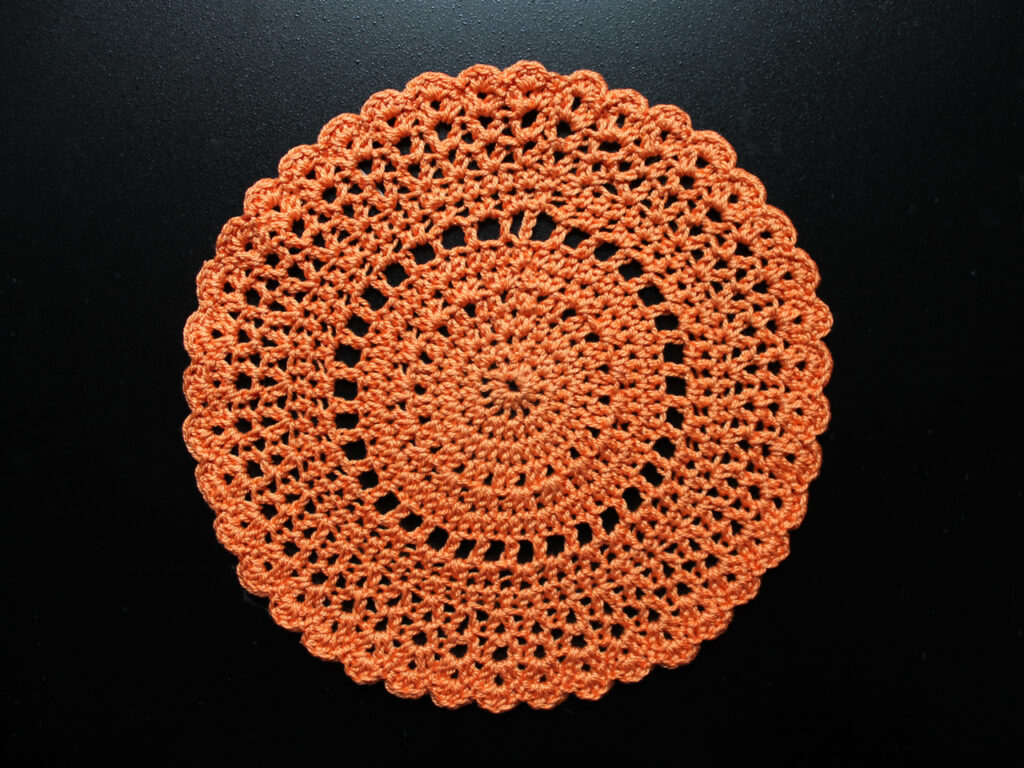
To Make the Small Doily :
(note: if you’re looking at the picture closely you’ll see the instructions are slightly different at the beginning and end of each row, but the way it’s written below turns out better)
I used a light weight worsted yarn that is a bamboo/wool blend and a 3.5 mm hook, but anything will do. A thicker yarn will just result in a larger doily.
To make sure you’re lining things up correctly, note that each set of 2 stitches lines up with the set from the previous row.
(1st row) Chain 3 (1st one is “the ring” and 2 next chains count as the first stitch) and make 9 Double Crochet Stitches into “the ring” (total of 10). Close the circle with a slip stitch.
(2) Chain 2. 1 dc at the base of the beginning chain (to make a ‘pair’ of stitches). 2 dcs into each stitch in previous row. 20 stitches total, including the first chain 2. Close with a slip stitch.
(3) Chain 2. 1 dc at the base of the beginning chain (to make a ‘pair’ of stitches). * 1 dc into next stitch and 2 dcs into the following one *. Repeat from *. Close with a slip stitch. 30 stitches including 1st chain-2.
(4) Chain 2. 1 dc at the base of the beginning chain (to make a ‘pair’ of stitches) * 1 dc into next 2 stitches and 2 dcs into the following one *. Repeat from *. Close with a slip stitch.
(5) This is the row with the ‘holes’ in it : Chain 2. * 1 dc into next stitch, chain 1 and skip a stitch (making a ‘hole’), 1 dc into next stitch, and 2 dcs into the following one *. Repeat from *. Finish row with 1 dc at the base of the beginning chain and close with a slip stitch.
(6) Chain 2. * 1 dc at the base of the beginning chain (to make a ‘pair’ of stitches). 1 dc into next 4 stitches, making one of those stitches into the ‘hole’ when you get to it, and 2 dcs into the following one *. Repeat from *. Close with a slip stitch.
Fasten off and change colours if you’d like.
(7) Chain 2. (Note we’ve changed to Single Crochet stitches for this row.) 1 sc at the base of the beginning chain (to make a ‘pair’ of stitches). * 1 sc into next 5 stitches and 2 dcs into the following one *. Repeat from *. Close with a slip stitch.
(8) This is the Scallop Trim row. Do not begin by chaining. After your slip stitch, skip 2 stitches and do 3 Treble Crochet stitches into the third. Chain 4. Do 3 Treble Crochet stitches into the next stitch. Skip 2 and slip stitch into the next. You’ve created your first scallop. Repeat all the way around. You should end up with 10 scallops, which line up with the ‘holes’ from row 5. Fasten off.
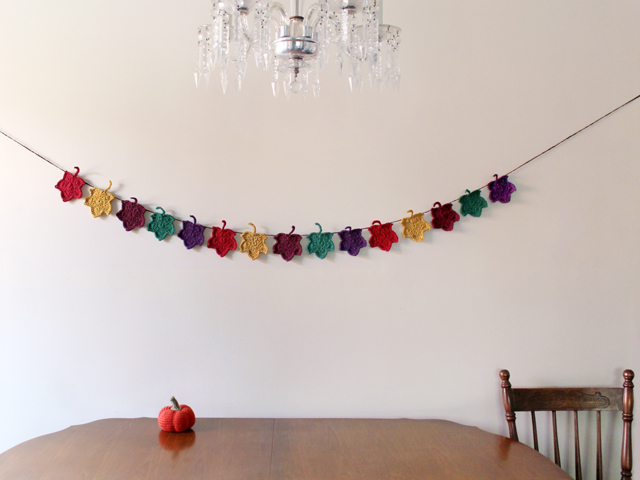
Follow up: Fall 2015 – The crocheted pumpkin was linked by Cindy over at Skip to My Lou Blog >> over here, where she thought that it would go well with some crocheted maple leaves. So I made some of the leaves and created a garland to prove her right! See that here.
Thanks a lot for taking a look,
xo loulou


