Gift Wrapping : How to Make a Felt Flower Topper
Hello! Here’s a fairly easy way to give the gifts you give a personalized unique look. Aside from adding a decorative handmade touch to your wrapping, this felt flower will almost certainly be saved and reused, over and over again. You might even get it back yourself one day!
Incorporating a row of simple stitching, it’s a fun quick and relaxing project for you to try, but is easy enough to make a good project for children to try, with your help on the cutting and finishing steps.
Supplies:
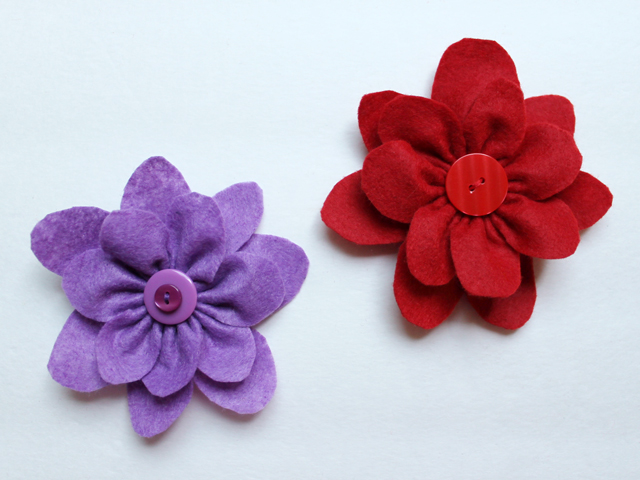
↑ I’m making two flowers. ↑
For each flower, you need:
– A sheet of crafting felt
– A length of matching embroidery thread
– A button (or two) in a matching or complimentary colour
– Sharp Scissors, a needle with a big enough eye for embroidery thread, a ruler and pen or pencil
↑ The finished creations. ↑
What to do:
↑ – Cut two rectangular pieces of felt, both about 8 1/2 inches (around 22 cm) long, one 2 inches wide and the other 1 1/2 inches wide. (Give yourself a rough guideline for where to cut by drawing on the felt.) Also, cut a circle about 1 1/4 inch across (not pictured). ↑
↑ – Working on each strip separately, cut scallops along one edge, in random widths of about 1 inch to 1 1/4 inch. It’s okay if you end up with a narrow scallop at the end. (Rather than even measuring, randomness results in a flower that looks more natural, and it’s easier. Win!) The inside cuts of each petal should come to about 1/2 inch from the straight edge of the felt. ↑
– Cut a piece of embroidery thread about 12 inches long and thread the needle, but don’t tie a knot.
– Line up both felt strips, with one edge flush.
↑ – Using small in-and-out stitches (aka, a running stitch), sew the strips together about 1/8 inch from the flush edge. The embroidery thread should be one thickness (not folded over). Leave a tail of thread at the beginning and end or the row of stitches. Remove the needle. ↑
↑ – Loop one tail of thread over the other (as though you’re doing the first part of a double knot) and pull, so the felt gathers along the thread to form a flower shape. ↑
– Secure by tying the second part of a double knot and then knot again for good measure.
– Rethread the needle with one end of the thread and pass through the edge in the middle of the flower, and through the button hole(s). Pass back through the flower and through the circle of felt. Remove the needle and thread the other end, doing the same thing (going through the edge beside the centre of the flower, through the button hole and back through the flower and felt circle.
↑ – Finish by tying a good knot. ↑
↑ – Play with the petals, separating them to give the flower depth. ↑
↑ – Use the tails of the embroidery thread to attach the flower to ribbon on the gift. ↑
Curious to know what’s in the box?
This gift was for my friend Meghan’s birthday. I made her a crocheted cowl scarf, using cotton yarn. (If you’re a crocheter and are interested in knowing how to make one, I included the instructions at the bottom of this post.)
↑ A matching greeting card made with a pre-made card base, some card-stock weight paper, and alphabet stickers. (I’d run out of “A”s so used an up-side-down “V”!) ↑
These felt flowers are “crushable”, therefore are a good choice if you need to mail your gift. I know a certain someone who will be receiving the red one this Christmas.
I hope you enjoyed this post and that you’ll try making a felt flower gift decoration yourself! Thanks for reading.
xo loulou


